
0
Owner's of the Canon Indoor Furnishings RS-CL07 gave it a score of 0 out of 5. Here's how the scores stacked up:
5
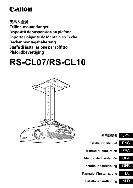
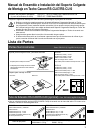
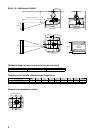
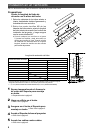
InstalaciónenunTechoPlanoyaNivel
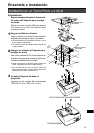
Ensamble e Instalación
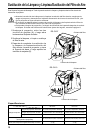
Preparativos:
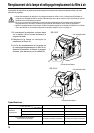
Separe temporalmente el Accesorio
de unión del Soporte para montaje
en techo
RetireloscuatrotornillosM5paraseparar
elAccesoriodeunióndelSoportepara
montajeentecho.
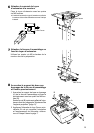
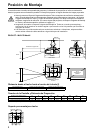
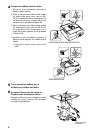
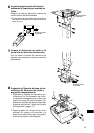
1
Haga un oricio en el techo
Hagaunoricioeneltechoandeinstalarel
Soporteparamontajeentechoyloscables.
●Cuandodeterminelaposicióndeloricio,usela
hojamodelosuministrada.
●Ladirecciónhacialapantallaestáindicadaen
lahojamodelo.
2
Asegure en el techo el Soporte para
montaje en techo
UsecuatrotornillosM13andeaseguraren
eltechoelSoporteparamontajeentechocon
laechaorientadahacialapantalla.
●AntesdeasegurarelSoporteparamontajeen
techo,cercióresederetirarlahojamodelo.
●LostornillosM13noseincluyenentrelas
partessuministradas.PreparelostornillosM13
adecuadosalaestructuradeltecho.
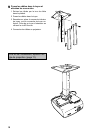
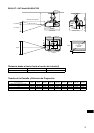
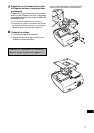
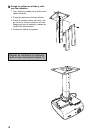
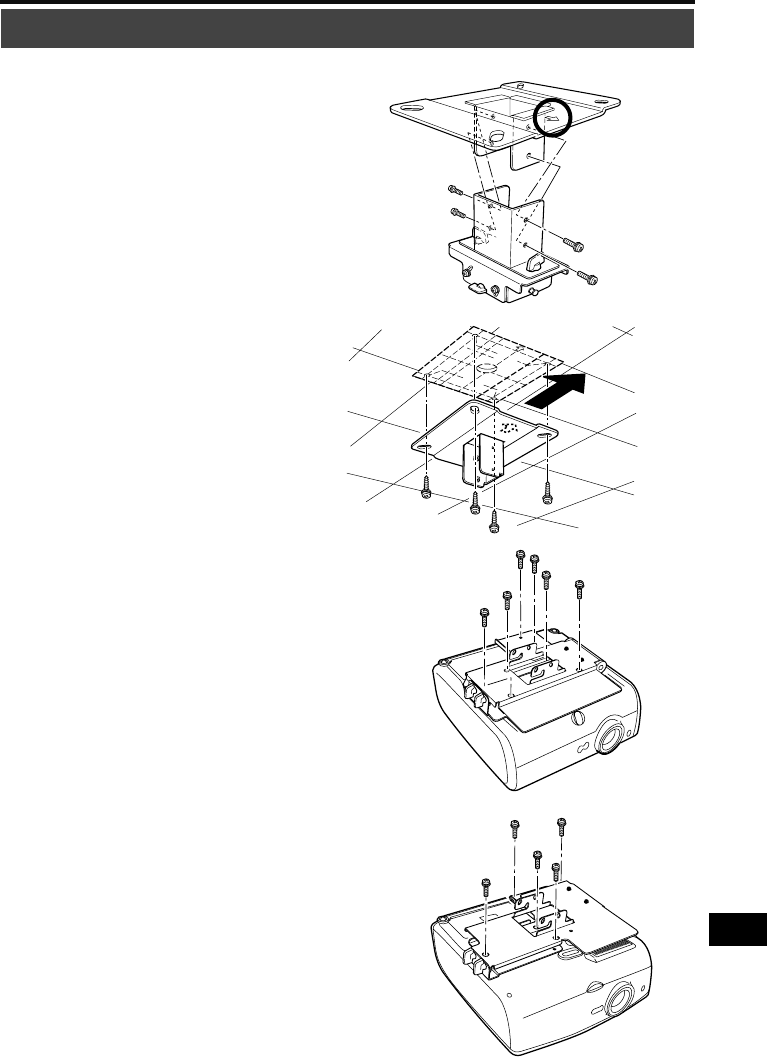
3
Acople el Soporte de base al
proyector
AsegureconlostornillosM4suministrados
(RS-CL07:6unid.;RS-CL10:5unid.).
WUX10MarkII/SX7MarkII/SX60/X700
SX80MarkII/SX800
Direcciónhacia
lapantalla
Direcciónhacia
lapantalla


Find Your Products By Category
- Home Audio
- Portable Media
- Computer Equipment
- Musical Instruments & Equipment
- Power Tools
- Video Game
- Car Audio and Video
- Baby
- Lawn and Garden
- Communications
- TV and Video
- Household Appliance
- Kitchen Appliance
- Personal Care
- Photography
- Marine Equipment
- Laundry Appliance
- Fitness & Sports
- Automotive
- Cell Phone
Please Login
