
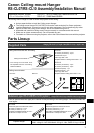
0
Owner's of the Canon Indoor Furnishings RS-CL10 gave it a score of 0 out of 5. Here's how the scores stacked up:


5
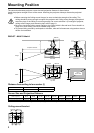
InstallationtoatandlevelCeiling
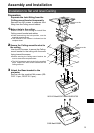
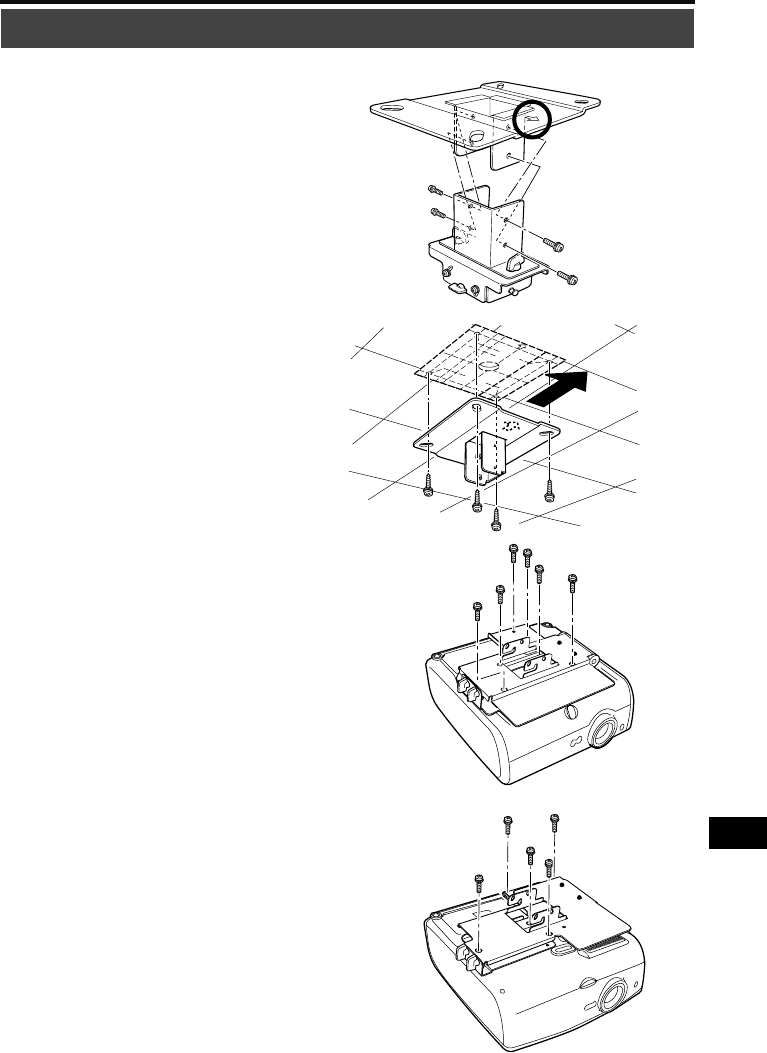
Assembly and Installation
Preparation:
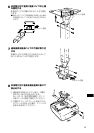
Separate the Joint tting from the
Ceiling-mount bracket temporarily
RemovefourM5screwstoseparateJoint
ttingfromtheCeiling-mountbracket.
1
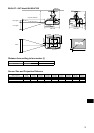
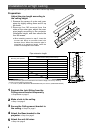
Make a hole in the ceiling
Makeaholeintheceilingtoinstallthe
Ceiling-mountbracketandcables.
●Whendeterminingtheholeposition,usethe
suppliedtemplatesheet.
●Thedirectiontothescreenisindicatedonthe
templatesheet.
2
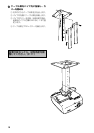
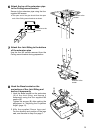
Secure the Ceiling-mount bracket to
the ceiling
UsefourM13screws,tosecuretheCeiling-
mountbrackettotheceilingwiththearrow
facingtowardthescreen.
●BeforesecuringtheCeiling-mountbracket,be
suretoremovethetemplatesheet.
●TheM13screwsarenotincludedinthesupplied
parts.PreparetheM13screwssuitableforthe
ceilingstructure.
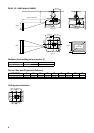
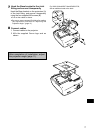
3
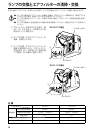
Attach the Base bracket to the
projector
SecurewiththesuppliedM4screws(RS-
CL07
:
6pcs.;RS-CL10
:
5pcs.).
WUX10MarkII/SX7MarkII/SX60/X700
SX80MarkII/SX800
Directiontothe
screen
Directiontothe
screen


Find Your Products By Category
- Home Audio
- Portable Media
- Computer Equipment
- Musical Instruments & Equipment
- Power Tools
- Video Game
- Car Audio and Video
- Baby
- Lawn and Garden
- Communications
- TV and Video
- Household Appliance
- Kitchen Appliance
- Personal Care
- Photography
- Marine Equipment
- Laundry Appliance
- Fitness & Sports
- Automotive
- Cell Phone
Please Login
